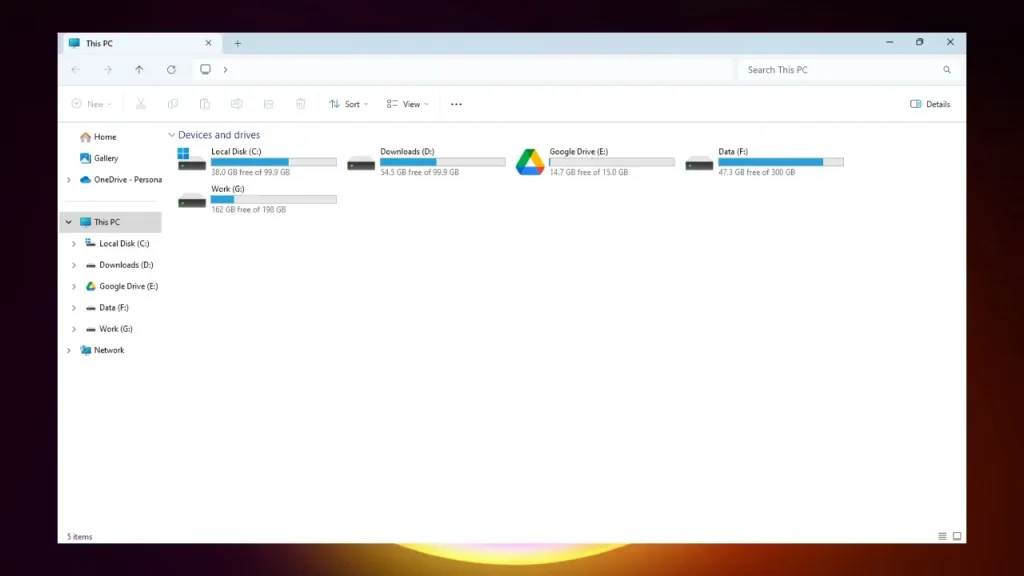
Disk partitioning is a fundamental concept in computer systems that involves dividing a physical storage device (like a hard drive or SSD) into multiple logical sections, or partitions. These partitions can be formatted with different file systems (such as NTFS, FAT32, or exFAT) and used for various purposes, such as storing operating systems, data, or applications.
Benefits of Creating Disk Partitions
- Separate Operating Systems: If you want to run multiple operating systems on the same computer, you can create a separate partition for each OS.
- Dedicated Data Storage: Allocate a partition specifically for storing your personal files, documents, photos, and videos.
- System Recovery: Having a dedicated system partition can make it easier to restore your computer to a previous state in case of system failures or malware infections.
- Data Security: If you need to encrypt sensitive data, you can create a separate partition and encrypt it using BitLocker or other encryption tools.
What You Need Before Creating a Partition in Windows 11
Checking Disk Space Availability
Before you start creating a partition in Windows 11, it’s crucial to ensure that you have enough free disk space. Open the Disk Management tool by right-clicking on the Start menu and selecting “Disk Management.” Here, you can see the available space on each drive. To create a new partition, you’ll need to shrink an existing volume to free up unallocated space.
Understanding Disk Management Tool in Windows 11
The Disk Management tool in Windows 11 is a built-in utility that allows you to manage your hard drives and partitions. You can use it to create, delete, format, and resize partitions. It’s a user-friendly tool that provides a graphical interface for managing your disk space. Familiarize yourself with its features and options to make the partitioning process smoother.
Backing Up Important Data
Before making any changes to your disk partitions, it’s essential to back up your important data. Partitioning involves modifying the structure of your hard drive, which can sometimes lead to data loss if not done correctly. Use an external drive or cloud storage to back up your files. This ensures that your data is safe in case anything goes wrong during the partitioning process.
Different Ways to Create a Partition in Windows 11
Creating partitions in Windows 11 can help you organize your data, improve system performance, and manage multiple operating systems. There are several methods to create partitions, each with its own advantages and steps. Here, we’ll explore three different ways to create a partition in Windows 11: using Disk Management, Command Prompt, and third-party tools.
How to Create a Partition in Windows 11 Using Disk Management
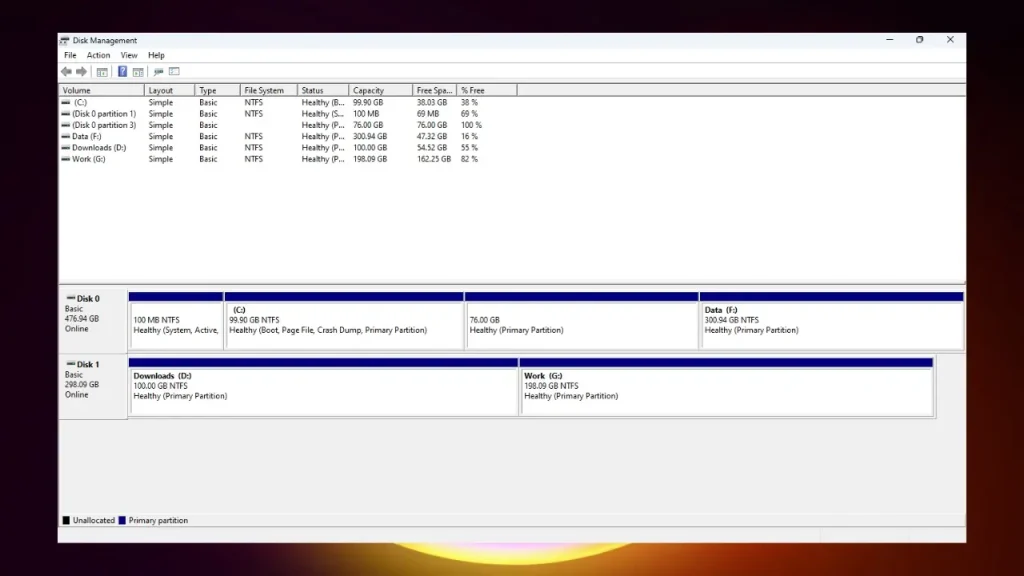
- Open Disk Management Tool
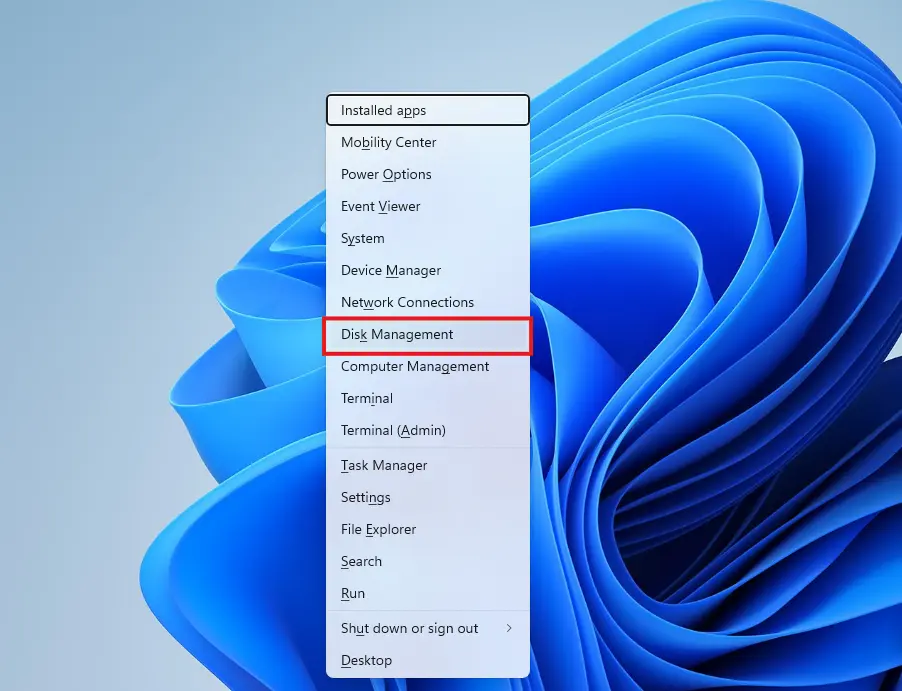
- Press the Windows key + X: This will open the Quick Access menu.
- Select Disk Management:
Choose “Disk Management” from the list of options.
- Shrink an Existing Partition
- Right-click on the partition: Choose the partition you want to shrink.
- Select Shrink Volume: Click on “Shrink Volume” from the context menu.
- Enter the size: Specify the amount of space you want to shrink in megabytes.
- Click Shrink: Click the “Shrink” button to proceed.
- Create a New Partition (Volume)
- Right-click on the unallocated space: The shrunk partition will leave unallocated space. Right-click on this unallocated space.
- Select New Simple Volume: Choose “New Simple Volume” from the context menu.
- Follow the wizard: The New Simple Volume wizard will guide you through the process.
- Specify the size: Enter the desired size for the new partition.
- Assign a drive letter: Select a drive letter for the new partition.
- Format the partition: Choose the file system (e.g., NTFS, FAT32) and assign a volume label.
- Complete the wizard: Click “Finish” to complete the process.
- Assign a Drive Letter
If you didn’t assign a drive letter during the wizard, you can do so later by:
- Right-click on the new partition: In Disk Management, right-click on the newly created partition.
- Select Change Drive Letter and Paths: Choose “Change Drive Letter and Paths” from the context menu.
- Assign a drive letter: Select a drive letter and click “OK.”
- Format the New Partition
If you didn’t format the partition during the wizard, you can do so later by:
- Right-click on the new partition: In Disk Management, right-click on the newly created partition.
- Select Format: Choose “Format” from the context menu.
- Configure the format: Select the file system, volume label, and other options.
- Click Start: Click “Start” to begin the formatting process.
By following these steps and referring to the visual guides, you can successfully create a new partition in Windows 11 using Disk Management.
How to Create a Partition in Windows 11 Using Command Prompt
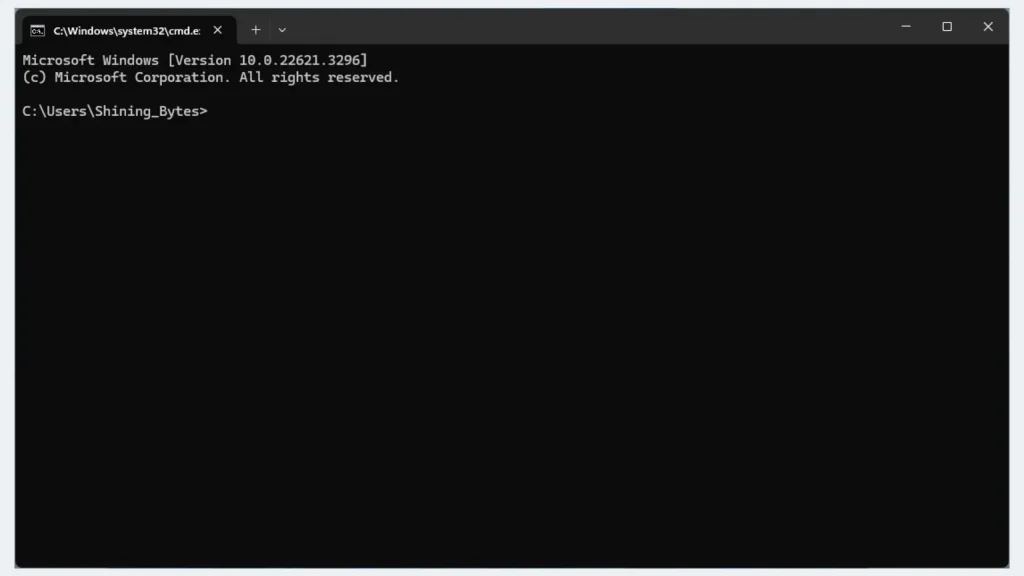
Diskpart is a command-line utility in Windows that allows you to manage disk partitions. It provides more granular control compared to the Disk Management tool.
Steps:
- Open Command Prompt as Administrator: Search for “Command Prompt” in the Start menu, right-click on it, and select “Run as administrator.”
- Launch Diskpart: Type diskpart and press Enter.
- List Available Disks: Type list disk and press Enter. This will display a list of connected disks.
- Select a Disk: Identify the disk you want to partition and type select disk <disk number>, replacing <disk number> with the actual number of the disk.
- Create a Partition: To create a primary partition, type create partition primary. You can specify the size of the partition in megabytes using the size=<size> parameter. For example, to create a 100MB partition, you would type create partition primary size=100.
- Format the Partition: To format the newly created partition, type format fs=<filesystem> quick, replacing <filesystem> with the desired file system (e.g., NTFS, FAT32). The quick parameter performs a quick format, which is faster but may not completely erase existing data.
- Assign a Drive Letter: If you want to assign a drive letter to the partition, type assign letter=<letter>, replacing <letter> with the desired drive letter.
- Exit Diskpart: To exit the Diskpart utility, type exit and press Enter.
Example:
To create a 200MB NTFS partition on Disk 1 and assign it the drive letter “E”, you would use the following commands:
diskpart
list disk
select disk 1
create partition primary size=200
format fs=ntfs quick
assign letter=E
exit
Note:
- Be cautious when using command-line tools. Incorrect commands can lead to data loss.
- Always make sure to back up your important data before making changes to your disk partitions.
- For more advanced partitioning tasks or if you encounter errors, consider using third-party partitioning tools.
Using Third-Party Tools (Brief Overview)
While Windows’ built-in Disk Management and Command Prompt tools offer basic partitioning functionality, third-party partitioning software often provides more advanced features and a user-friendly interface. These tools can be particularly helpful for complex partitioning tasks or users who prefer a graphical interface.
Common Features of Third-Party Partitioning Tools:
- Intuitive GUI: Most third-party tools offer a graphical user interface that makes it easy to visualize and manage your partitions.
- Advanced Features: Many tools include features like resizing, moving, merging, and splitting partitions, as well as cloning and backing up entire disks.
- Data Recovery: Some partitioning tools also offer data recovery capabilities, allowing you to recover lost or deleted data in case of accidental deletions or partition errors.
- Compatibility: Third-party tools often support a wider range of file systems and disk types compared to the built-in Windows tools.
Popular Third-Party Partitioning Tools:
- EaseUS Partition Master: A comprehensive partitioning tool with features like resizing, moving, merging, and splitting partitions.
- MiniTool Partition Wizard: Offers advanced partitioning capabilities and supports various file systems.
- AOMEI Partition Assistant: A free partitioning tool with a simple interface and a wide range of features.
- Acronis Disk Director: A powerful partitioning tool with additional features like data backup and recovery.
Troubleshooting Common Issues in Partitioning Windows 11

1. Insufficient Disk Space
- Check available space: Ensure you have enough free space on your disk to create a new partition.
- Delete unnecessary files: Remove unwanted files or programs to free up space.
- Move files to an external drive: Temporarily transfer files to an external drive to create more space.
2. Unallocated Space Not Showing
- Check disk status: Verify that the disk is not marked as “Offline” or “Dynamic.”
- Convert disk to Basic: If the disk is Dynamic, convert it to Basic using Disk Management.
- Check for errors: Scan the disk for errors using the Check Disk tool (chkdsk).
3. Unable to Shrink Partition
- Check for open files: Close any applications that might be using files on the partition you want to shrink.
- Try shrinking a smaller amount: Start by shrinking a smaller portion of the partition and gradually increase the size if successful.
- Use a third-party tool: Some partitioning tools may be able to shrink partitions that Disk Management cannot.
4. Disk Management Errors
- Run Check Disk: Use the Check Disk tool (chkdsk) to scan the disk for errors and repair any issues.
- Restart Windows: Sometimes, a simple restart can resolve temporary errors or shutdown your system completely.
- Try a different partition tool: If you continue to encounter errors, consider using a third-party partitioning tool.
6. FAQs About Creating Partitions in Windows 11
1. Can I create a partition without losing my data?
Yes, you can typically create a partition without losing your data if you follow the correct steps. It’s important to back up your important files before making any changes to your disk partitions.
2. Can I resize or delete an existing partition?
Yes, you can resize or delete an existing partition using Disk Management or third-party partitioning tools. However, resizing a partition may require moving data, so it’s recommended to back up your files beforehand.
3. What is the difference between a primary and a logical partition?
A primary partition is a top-level partition that can be used to boot an operating system. A logical partition is a secondary partition created within an extended partition. You can have up to four primary partitions or three primary partitions and one extended partition on a disk.
4. Can I create a partition on a USB drive?
Yes, you can create partitions on USB drives using the same methods as for internal hard drives. However, be aware that some USB drives may have pre-existing partitions that cannot be modified.
5. What file system should I use for my partition?
The choice of file system depends on your specific needs. NTFS is the most common file system for Windows and supports larger file sizes and features like compression and encryption. FAT32 is suitable for smaller partitions and is compatible with older devices, but it has a maximum file size limit. exFAT is a newer file system that combines the advantages of NTFS and FAT32, making it a good choice for external drives and other devices.
6. Can I convert a Dynamic disk to a Basic disk?
Yes, you can convert a Dynamic disk to a Basic disk using Disk Management. However, this may require moving data, so it’s recommended to back up your files beforehand.
7. What should I do if I encounter errors during partitioning?
If you encounter errors during partitioning, try the following:
1. Run Check Disk: Scan the disk for errors using the Check Disk tool (chkdsk).
2. Restart Windows: Sometimes, a simple restart can resolve temporary errors.
3. Use a third-party tool: A third-party partitioning tool may be able to resolve issues that Disk Management cannot.
4. Consult a professional: If you’re unsure how to proceed or encounter persistent errors, consider consulting a professional for assistance.
7. Conclusion
Partitioning your Windows 11 disk is a powerful tool for organizing your data, improving performance, and managing multiple operating systems. By understanding the different methods of partitioning and following the steps outlined in this guide, you can effectively create, manage, and optimize your disk partitions to suit your specific needs.
Key Takeaways:
- Benefits of partitioning: Partitioning can improve organization, performance, and backup management.
- Methods of partitioning: You can create partitions using Disk Management, Command Prompt, or third-party tools.
- Common issues: Be aware of potential issues like insufficient disk space, unallocated space not showing, and Disk Management errors.
- Troubleshooting tips: Follow the troubleshooting steps outlined in this guide to resolve common problems.
By carefully planning and executing your partitioning tasks, you can ensure that your Windows 11 system runs smoothly and efficiently.

