Did you know that simply closing your laptop lid on Windows 11 might not be the most effective way to shut it down? Many users believe that putting their laptop to sleep or letting it hibernate is enough, but this can lead to unexpected issues over time.
Properly shutting down your laptop is crucial for maintaining its health and performance. Incomplete shutdowns can lead to potential data corruption, reduced battery life, and unnecessary strain on hardware. Without a full shutdown, background processes and updates might continue to run, which can slow down your system and cause other problems.
This blog post is a comprehensive guide on how to fully shut down your Windows 11 laptop. We will walk you through different methods to achieve a complete shutdown, including how to disable Fast Startup, ensuring your laptop gets the break it needs for optimal performance. By the end of this guide, you’ll know exactly how to fully shut down your laptop and prevent any potential issues.
Disabling Fast Startup for a Complete Shutdown Windows 11
Fast Startup is a feature introduced in Windows 8 that aims to speed up the boot process after shutting down your computer. It essentially puts your system into a hybrid state between a full shutdown and sleep mode. While convenient for quicker startups, Fast Startup can prevent a complete shutdown of Windows 11. When enabled, your system utilizes hibernation files to save the kernel and system state, allowing it to resume operation faster on the next startup. However, this also means certain background processes might still be running, and your hardware doesn’t fully power down.
Turning Off Fast Startup:
- Access Control Panel and Power Options:
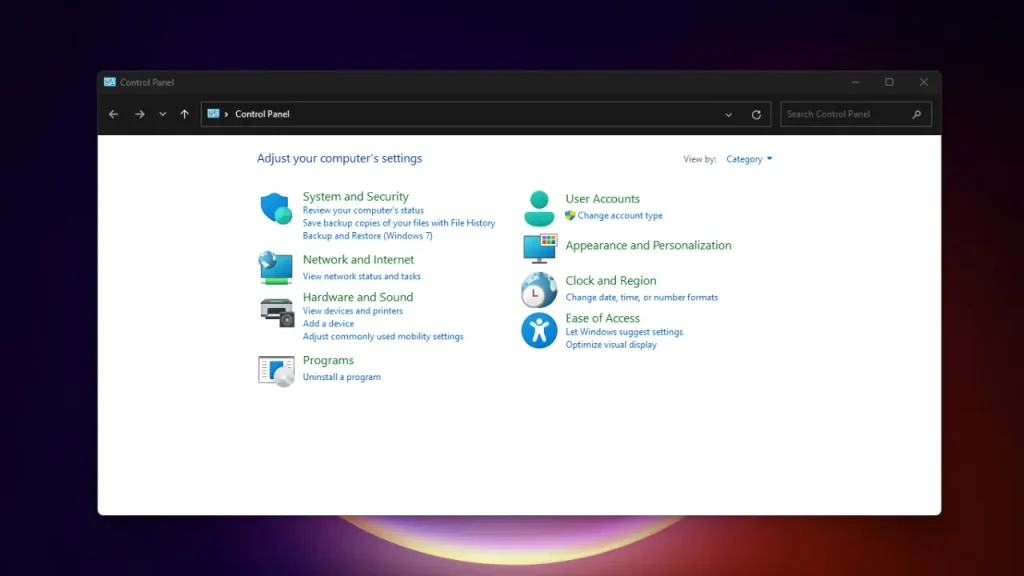
- Start by typing “control panel” in the Windows search bar and select “Control Panel” from the results.
- In Control Panel, navigate to “Power Options.” You can typically find this under the “System and Security” category or use the search function within Control Panel to locate it directly.
- Navigate to “Choose what the power buttons do”:
- Within the Power Options window, look for the option on the left-hand side labeled “Choose what the power buttons do.” Click on this option.
- Adjust Power Settings:
- You may need to click on “Change settings that are currently unavailable” at the top of the window to unlock the settings.
- Scroll down to find the “Shutdown settings” section.
- Disable Fast Startup:
- Under “Shutdown settings,” locate the checkbox labeled “Turn on fast startup (recommended).”
- Uncheck this box to disable Fast Startup.
- Apply Changes:
- Once unchecked, scroll to the bottom and click “Save changes” to apply your new power settings.
By following these steps and disabling Fast Startup, you’ll ensure a complete shutdown of Windows 11, allowing your system to fully power down and reap the benefits mentioned earlier.
II. Different Methods to Fully Shut Down Windows 11 Laptop
Now that you understand the importance of a complete shutdown of Windows 11 and how to disable Fast Startup, let’s explore the different ways to achieve this shutdown.
A. Using the Start Menu:
This is the most common and user-friendly method for shutting down your Windows 11 laptop. Here’s how:
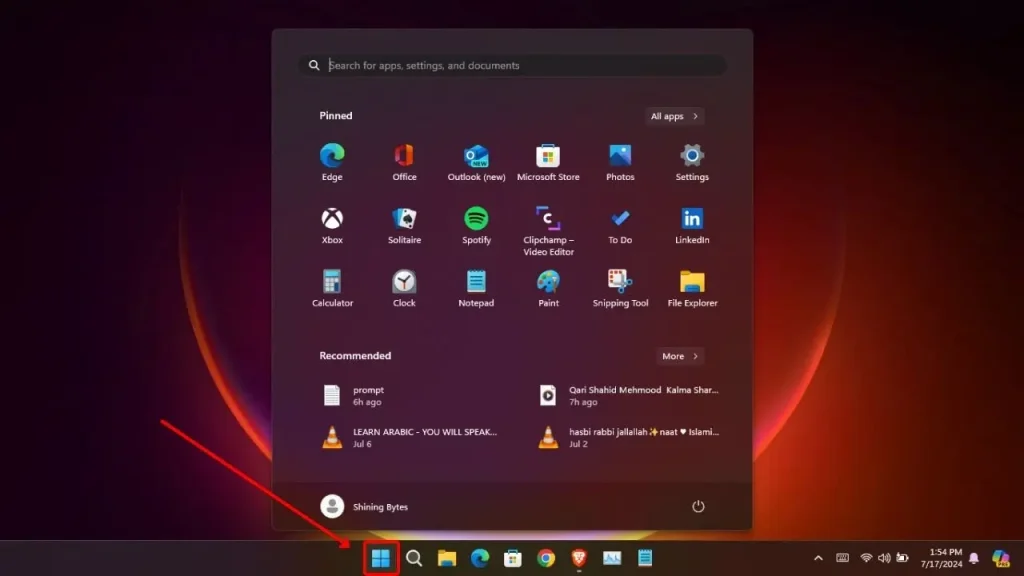
- Click on the Start menu icon in the taskbar.
- Locate the power icon in the Start menu. It’s usually located on the bottom left corner.
- Click on the power icon and select “Shut down” from the available options.
B. Using the Power Button:
- Open Control Panel: Click on the Start menu, type “Control Panel,” and open it.
- Navigate to Power Options: In the Control Panel window, find and click on “Power Options.”
- Access Power Button Settings: In the Power Options window, look for “Choose what the power buttons do” on the left sidebar. Click on it.
- Configure Power Button Settings: Under “When I press the power button,” select the option “Shut down” from the dropdown menu.
- Save Changes: Click “Save changes” to apply your settings.
- Shut Down Using Power Button: Press the power button on your laptop to shut it down.
C. Using the Shortcut Key:
For a quicker way to shut down Windows 11, you can use a handy keyboard shortcut:
- Press and hold the Windows key on your keyboard.
- While holding the Windows key, press the L key. This will bring up the lock screen.
- In the bottom right corner of the lock screen, you’ll see a power icon. Click on it and select “Shut down” from the menu.
Alternatively:
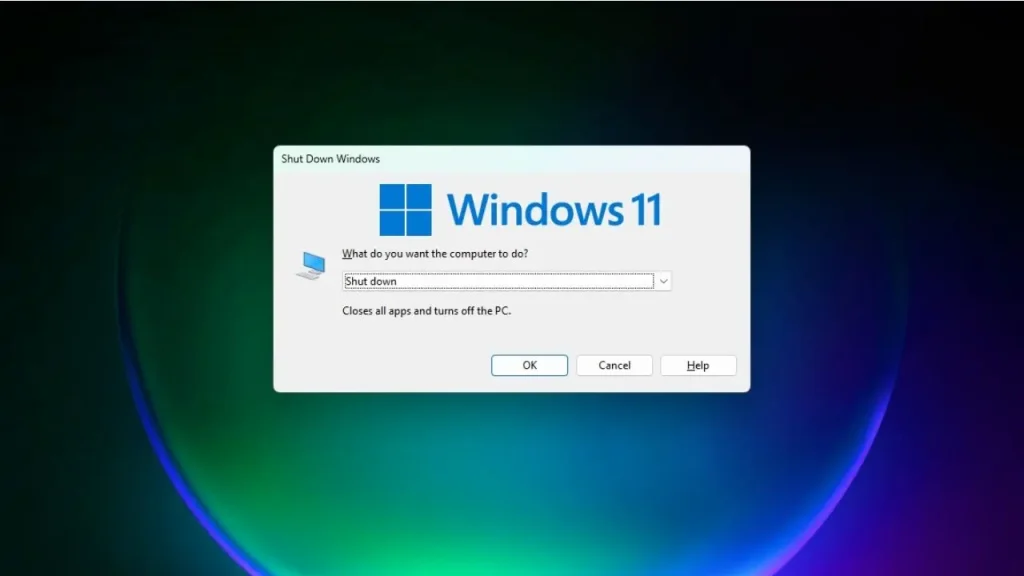
- Press and hold the Windows key on your keyboard.
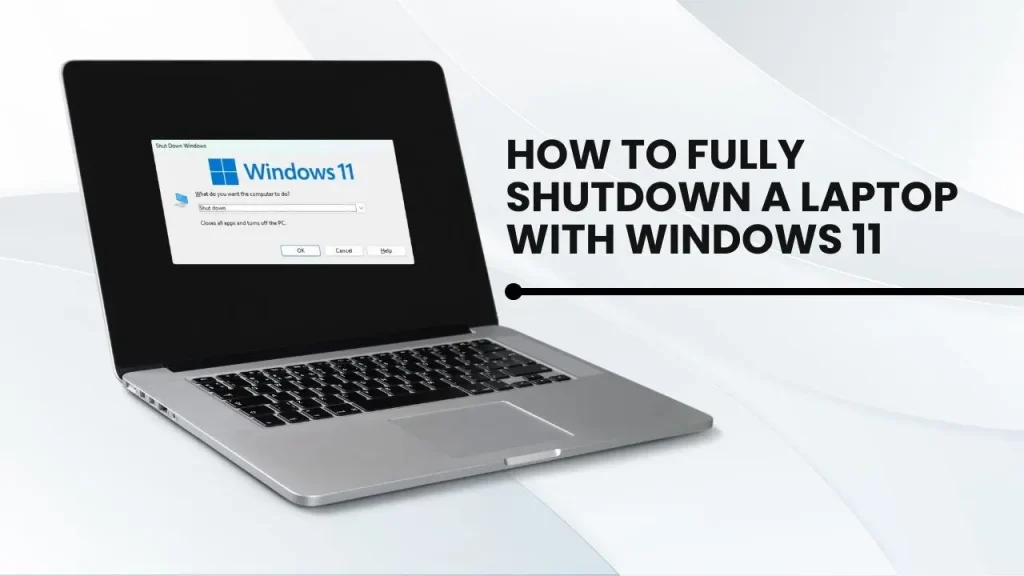
- While holding the Windows key, press Alt+F4 keys simultaneously. This will bring up the Shut down Windows dialog box.
- Use the arrow keys to select “Shut down” and press Enter.
D. Using the Command Prompt:
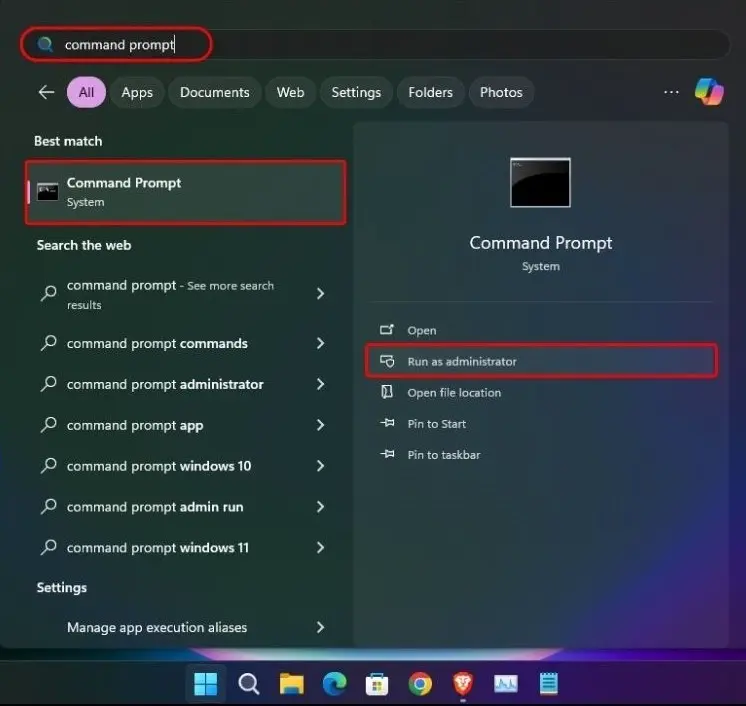
The Command Prompt offers a more technical approach to shutting down your system. This method might be useful for troubleshooting purposes. Here’s how to do it:
- Open the Start menu and type “cmd” in the search bar.
- Right-click on the “Command Prompt” application and select “Run as administrator“.
- In the Command Prompt window, type the following command:
- shutdown /s
- Press Enter on your keyboard. Your computer will initiate a complete shutdown of Windows 11.
E. Using Windows Settings (Optional):
While not a direct shutdown method, you can access additional power settings through Windows Settings:
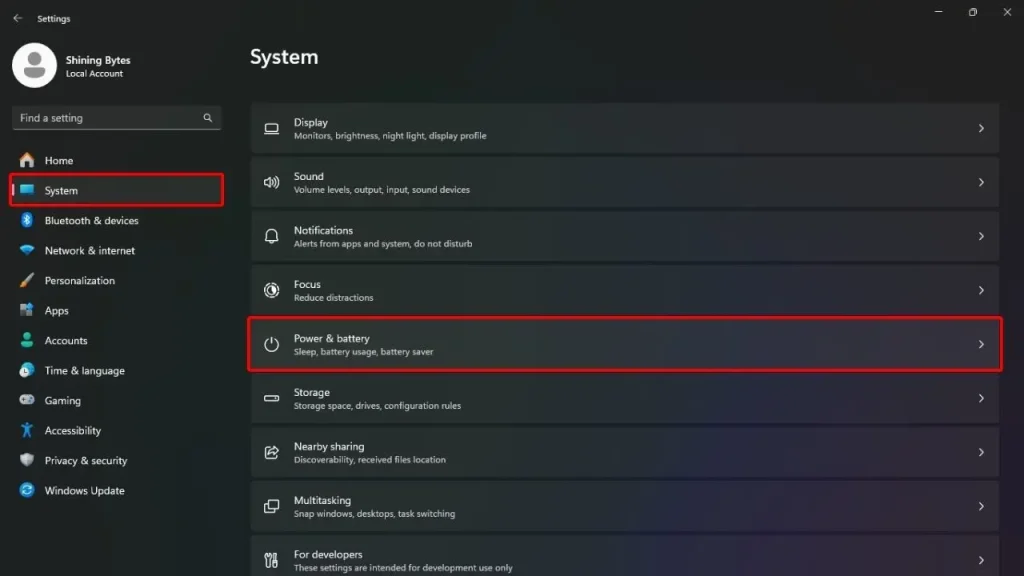
- Click on the Start menu and select “Settings” (gear icon).
- Navigate to “System” and then select “Power & sleep“.
- Here you can configure various power options like sleep mode behavior and screen timeout settings. While not directly related to shutting down, these options can influence your overall power consumption and indirectly contribute to a more efficient shutdown routine.
Advanced Shutdown Options
While the methods covered so far provide a complete shutdown of Windows 11, there are additional options for more specific needs:
A. Scheduled Shutdown:
This feature allows you to program your computer to shut down automatically at a predetermined time. This can be useful for:
- Saving Energy: Schedule a shutdown for when you know you won’t be using your laptop for an extended period, like overnight.
- Software Updates: If updates require a restart, you can schedule a shutdown after they’ve downloaded and installed automatically.
- Parental Controls: Set a bedtime shutdown to encourage healthy screen time habits for children.
How to Set Up a Scheduled Shutdown:
- Open the Command Prompt with administrator privileges (refer to section II.C for instructions).
- Type the following command, replacing
<time>with your desired shutdown time in 24-hour format (HH:MM), and<Duration>with the delay in minutes (optional): - shutdown /s /t <time> [ /d <duration> ]
For example:
- To shut down at 10:00 PM, type:
- shutdown /s /t 22:00
- To shut down in 30 minutes, type:
- shutdown /s /t 00:30
B. Force Shutdown:
In rare cases, your computer might become unresponsive or freeze completely. In such situations, you may need to perform a forced shutdown. However, this should be a last resort, as it can lead to data loss if applications haven’t had a chance to save properly.
When and How to Force Shutdown Safely:
- Only attempt a forced shutdown if your computer is completely unresponsive. The cursor won’t move, and no programs will respond.
- Hold down the power button for at least 10 seconds. This will forcefully cut power to your device.
Risks Associated with Forced Shutdown:
- Data Loss: Unsaved work in open applications might be lost.
- File System Corruption: Improper shutdown can corrupt files on your hard drive.
- System Instability: Forced shutdowns can lead to unexpected behavior upon restart.
It’s important to prioritize a complete shutdown of Windows 11 whenever possible to minimize these risks.
Troubleshooting Common Shutdown Issues
Even after performing a complete shutdown of Windows 11, you might occasionally encounter issues where your laptop doesn’t shut down properly. Here’s how to troubleshoot some common problems related to shutdown:

Laptop Not Shutting Down Properly:
- Check for Running Applications: Sometimes, applications can prevent your laptop from shutting down completely. Ensure you’ve closed all programs before initiating shutdown.
- Disable Startup Programs: Certain programs might be configured to launch automatically at startup. These can interfere with the shutdown process. Temporarily disable startup programs to see if it resolves the issue. You can access startup programs through Task Manager.
- Update Drivers: Outdated drivers, especially for display or network adapters, can sometimes cause shutdown problems. Check for and install any available driver updates from the manufacturer’s website.
- Scan for Malware: Malware can interfere with system processes, including shutdown. Run a thorough malware scan using your preferred security software.
Solutions to Common Problems:
The specific solution will depend on the identified cause. Here are some possible approaches:
- Close Conflicting Applications: Identify and close any programs that might be preventing shutdown. Right-click on the taskbar and select “Task Manager” to view running processes.
- Manage Startup Programs: In the Task Manager, go to the “Startup” tab and disable any programs you don’t want to launch automatically at startup.
- Update Drivers: Visit the device manufacturer’s website and download the latest drivers for your laptop model.
- Perform a Malware Scan: Use your antivirus or anti-malware software to scan your system for any potential threats.
When to Seek Professional Help:
If you’ve tried the troubleshooting steps above and your laptop continues to experience shutdown issues, it’s recommended to seek professional help from a computer technician. They can diagnose the problem more thoroughly and recommend appropriate solutions, which might involve hardware repairs or software troubleshooting beyond the scope of basic user fixes.
Also Check This: Timeout Error in Windows 11! How to Fix it
IV. Benefits of Properly Shutting Down Windows 11 Laptop
Taking the time to perform a complete shutdown of Windows 11 offers several advantages for your laptop’s health and performance:
A. Improved System Performance:
Over time, your system accumulates temporary files and leftover data from running programs. These can clutter your hard drive and slow down your computer’s overall performance. When you shut down your laptop completely, Windows 11 has the opportunity to perform essential housekeeping tasks. This includes:
- Clearing Temporary Files: Temporary files are created by various applications to store data during operation. A complete shutdown allows Windows 11 to identify and remove these unnecessary files, freeing up valuable disk space.
- Flushing Memory Cache: The system cache stores frequently accessed data for quicker retrieval. However, this cache can become bloated over time. Shutting down allows Windows 11 to clear the cache and optimize it for improved performance upon restart.
- Reseting System Processes: Certain system processes might remain active in the background even when you close applications. A complete shutdown restarts these processes, ensuring they function optimally on the next startup.
By allowing these cleanup tasks to run during a complete shutdown, you’ll experience a smoother and more responsive system when you boot up your Windows 11 laptop again.
B. Increased Battery Life:
While sleep mode offers a convenient way to resume work quickly, it still consumes a small amount of power to keep your system running in a low-power state. Performing a complete shutdown of Windows 11 completely halts all power consumption. This translates to significant battery savings, especially if you’re not using your laptop for extended periods. Over time, consistently implementing proper shutdowns can contribute to a longer lifespan for your laptop’s battery.
C. Reduced Hardware Strain:
Your laptop’s internal components, like the CPU and the fan, generate heat during operation. When you leave your system in sleep mode, these components remain partially engaged, causing them to heat up even though you’re not actively using the computer. A complete shutdown allows all hardware components to power down completely. This cooling period helps reduce wear and tear on your hardware, potentially extending the lifespan of your laptop.
VI. Conclusion
A. Recap: Taking Control of Your Shutdown
In today’s fast-paced world, we often rely on sleep mode or simply closing the lid to power down our laptops. But as we’ve seen, a complete shutdown of Windows 11 offers significant advantages for your system’s health and performance.
This guide has equipped you with several methods to achieve a complete shutdown:
- Using the Start Menu: The most common and user-friendly method.
- Using the Shortcut Key: A handy keyboard shortcut for quick shutdowns.
- Using the Command Prompt: A technical approach for troubleshooting purposes.
- Using the Power Button: Configure your power button settings to initiate a complete shutdown.
We also explored the importance of disabling Fast Startup to ensure a true shutdown and reap the benefits of:
- Improved System Performance: Regular shutdowns allow Windows 11 to clean up temporary files and optimize system processes.
- Increased Battery Life: Complete shutdowns eliminate power consumption during idle periods.
- Reduced Hardware Strain: Shutting down allows your laptop’s components to cool down completely, extending their lifespan.
B. Take Action and Share the Knowledge!
By incorporating these methods into your routine, you can ensure your Windows 11 laptop receives the proper rest it needs to function at its best.
Remember to close running applications before shutting down to avoid data loss, and consider enabling automatic updates to keep your system secure. We encourage you to put these tips into practice and share this valuable information with anyone who might find it helpful!

