Have you ever been waiting for a program to load in Windows 11, only to see a frustrating “timeout error” message appear on your screen? These timeout errors can be quite disruptive, preventing you from working efficiently and completing tasks on time.
But fear not, Windows 11 users! This blog post is your one-stop guide to understanding and fixing timeout errors. We’ll delve into the common causes of these errors and equip you with a step-by-step troubleshooting process to get you back on track. Whether you’re experiencing a timeout error in Windows 11 while browsing the web, running applications, or even during system startup, this guide will provide you with the knowledge and solutions to resolve the issue effectively.
So, why is it important to fix timeout errors? Timeout errors can not only disrupt your workflow but also indicate underlying problems with your system’s performance or stability. By addressing these errors promptly, you can ensure a smooth and efficient Windows 11 experience.
This blog post aims to be your comprehensive resource for fixing timeout errors in Windows 11. We’ll provide clear explanations, actionable steps, and valuable tips to help you troubleshoot and resolve the issue independently. Let’s dive into the world of Windows 11 troubleshooting and banish those pesky timeouts for good!
1: Understanding the Timeout Error in Windows 11
Before we jump into the fix, let’s understand what a timeout error in Windows 11 truly is. In simpler terms, a timeout error occurs when a program or process in your system takes longer than expected to complete a specific task. Windows 11 sets a time limit for these tasks, and if the program fails to respond within that time frame, you’ll encounter the dreaded timeout error.
Common Causes of Timeout Errors
- Network Issues: Unstable or slow internet connections can lead to timeout errors, especially during online activities like browsing, downloading, or updating software.
- Outdated Drivers: Drivers that are not up-to-date can cause communication delays between hardware and the operating system, resulting in timeout errors.
- System Overload: Running too many applications simultaneously or having insufficient system resources (CPU, RAM) can overwhelm the system, causing processes to timeout.
- Incorrect Settings: Misconfigured power settings, registry entries, or group policies can lead to premature timeout errors.
- Malware or Viruses: Malicious software can interfere with system processes, causing them to run longer than expected and trigger timeout errors.
- Faulty Hardware: Defective hardware components, such as network cards or hard drives, can cause processes to fail and timeout.
How Timeout Errors Affect Your System
- System Performance: Timeout errors can significantly degrade system performance, making your computer slow and unresponsive.
- Application Crashes: Applications may freeze or crash when they encounter timeout errors, leading to loss of work and productivity.
- Network Interruptions: Timeout errors in network processes can disrupt internet connectivity, affecting online activities and communication.
- User Frustration: Frequent timeout errors can be highly frustrating, interrupting your workflow and causing delays in completing tasks.
- Potential Data Loss: In severe cases, timeout errors can lead to data corruption or loss, especially if they occur during critical operations like file transfers or updates.
2: Symptoms of Timeout Errors
A timeout error in Windows 11 won’t always announce itself with a loud error message. Sometimes, the signs can be more subtle, but no less disruptive to your workflow. Here are some common symptoms you might encounter:
- Frozen Applications: This is a classic symptom. An application you’re using might suddenly freeze up and become unresponsive, displaying a progress bar stuck indefinitely. Clicking or interacting with the program will have no effect.
- Unresponsive System: In severe cases, the timeout error might affect the entire system, causing it to become sluggish and unresponsive. You might experience delays in opening programs, navigating menus, or performing even basic tasks.
- Failed Downloads and Uploads: When dealing with internet-related timeouts, you might encounter issues downloading files, updating applications, or even struggling to load web pages entirely. The download progress bar might hang indefinitely, or you might see error messages indicating a timeout error has occurred.
- Unexpected Application Crashes: In some cases, a timeout error can lead to the complete crash of an application. This can be particularly frustrating if you were working on something important and hadn’t saved your progress.
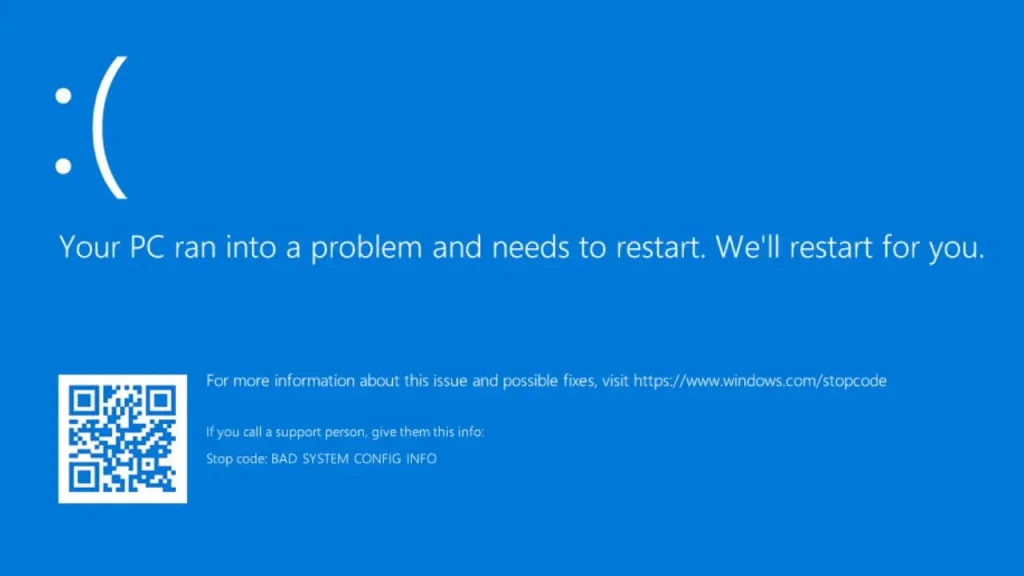
- Blue Screen of Death (BSOD): While less common, a timeout error, especially if it’s a hardware-related issue, could contribute to a Blue Screen of Death (BSOD) crash. This is a critical system error that can completely halt your computer and require a restart.
These symptoms can significantly disrupt your productivity. Imagine working on a document and your application freezes, forcing you to lose unsaved progress. Or, picture waiting for a crucial file to download for a project deadline, only to encounter a timeout error. These situations can be frustrating and delay your work.
By recognizing these common symptoms, you can be proactive in troubleshooting the timeout error in Windows 11 and get back to working efficiently.
3: Initial Troubleshooting Steps
Before diving into more advanced solutions, let’s tackle some basic troubleshooting steps that can often resolve a timeout error in Windows 11 quickly and effectively. These steps are quick to perform and can potentially save you time and effort.

- How to Restart:
- Click on the Start menu.
- Select the Power icon.
- Choose Restart.
- Why It Helps:
- Clears temporary files and cache: Restarting can clear out temporary files and cached data that might be causing the timeout error.
- Resets system processes: It resets the system’s processes and services, potentially resolving conflicts or stalled operations that could lead to timeout errors.
Checking Your Internet Connection
Since many timeout errors are related to network issues, ensuring your internet connection is stable and strong is crucial.
- Steps to Check Connection:
- Open the Settings app.
- Go to Network & Internet.
- Check the status of your network connection.
- Actions to Take:
- Restart your router: Unplug the router, wait for 30 seconds, and plug it back in.
- Connect to a different network: Try connecting to another Wi-Fi network or use a wired connection to see if the issue persists.
- Run the Network Troubleshooter:
- Open Settings.
- Go to Update & Security.
- Select Troubleshoot > Internet Connections > Run the troubleshooter.
Running Windows Update
Ensuring your system is up-to-date can fix many issues, including timeout errors caused by outdated software.
- How to Check for Updates:
- Open Settings.
- Navigate to Update & Security.
- Click on Windows Update.
- Select Check for updates.
- Importance of Updates:
- Security patches: Updates include security patches that protect your system from vulnerabilities.
- Bug fixes: They also provide fixes for bugs and issues that might be causing timeout errors.
- Improved performance: Updates can enhance overall system performance and stability.
Scanning for Malware and Viruses
Malware and viruses can interfere with system processes and cause various errors, including timeouts.
- Steps to Scan for Malware:
- Open Windows Security from the Start menu.
- Select Virus & threat protection.
- Click on Quick scan to check for immediate threats.
- For a more thorough check, choose Full scan.
- Additional Tips:
- Use a trusted antivirus program: If you have third-party antivirus software, run a full system scan.
- Regular scans: Schedule regular scans to keep your system protected from malware and viruses.
These initial troubleshooting steps are designed to address common causes of timeout errors in Windows 11. By following these steps, you can often resolve the issue quickly and get your system running smoothly again. If these steps do not fix the timeout error, more advanced troubleshooting may be required.
4: Fixing the Timeout Error: Step-by-Step Guide
If the initial troubleshooting steps didn’t banish those pesky timeout errors, don’t worry! This section dives into more advanced solutions to help you fix the issue in Windows 11.
4.1: Adjusting Power Settings
Windows 11 offers different power plans that prioritize either performance or battery life. In some cases, a power plan configured for power saving might throttle system resources and contribute to timeouts. Here’s how to adjust your power settings and potentially resolve the timeout error in Windows 11:

Access Power Settings: There are two ways to access power settings in Windows 11:
- Search Bar: Click on the Start menu search bar and type “power settings.” Select “Power & battery settings” from the search results.
- Settings App: Open the Settings app (Windows key + I). Navigate to “System” and then select “Power & battery.”
Configure Power Plan: In the Power & battery settings window, you’ll see the currently active power plan (evolved from “power schemes” in previous Windows versions). Here’s how to optimize it:
- Balanced Plan: If you’re on the “Balanced” power plan (default for most users), this should provide sufficient performance for everyday tasks. However, if you’re experiencing frequent timeouts, you can try switching to the “High performance” plan for a temporary boost.
- High performance plan: Click on the dropdown menu next to “Power mode” and select “High performance.” This plan prioritizes performance over power saving and might help alleviate timeout errors caused by resource limitations. However, keep in mind that this plan will also consume more battery power on laptops.
Advanced Power Settings (Optional): For more granular control, you can access advanced power settings. Click on “Additional power settings” at the bottom of the Power & battery settings window. This will open a new window with various power plan options.
- Open Settings:
- Click on the Start menu and select Settings (the gear icon).
- Navigate to Power & Battery:
- In the Settings window, go to System.
- Select Power & battery from the left sidebar.
Configuring Power Plan to Prevent Timeouts
- Choose or Customize a Power Plan:
- Under the Power mode section, select Additional power settings. This opens the Power Options window.
- Here, you can choose a power plan or customize an existing one. For preventing timeouts, it’s often best to use the High performance plan or create a custom plan.
- Create a Custom Power Plan:
- In the Power Options window, click on Create a power plan on the left sidebar.
- Choose High performance as the base for your new plan.
- Name your custom plan and click Next.
- Adjust Advanced Power Settings:
- After creating your plan, click on Change plan settings next to your custom plan.
- Select Change advanced power settings.
- In the Advanced settings window, expand the Sleep section.
- Sleep after: Set to Never or increase the time before the system goes to sleep.
- Hibernate after: Set to Never or increase the time before the system hibernates.
- Expand the Display section.
- Turn off display after: Increase the time or set to Never if you want the display to stay on longer.
- Expand the Hard disk section.
- Turn off hard disk after: Increase the time or set to Never.
- Click Apply and then OK to save the settings.
- Set the Custom Plan as Active:
- Ensure your new custom power plan is selected as the active plan in the Power Options window.
By adjusting the power settings, you can help prevent timeout errors caused by the system entering sleep or hibernation modes during critical tasks. This ensures that your Windows 11 system remains responsive and active, reducing the likelihood of encountering timeout errors during important operations.
4.2. Updating Drivers: Ensuring Compatibility and Optimal Performance
Outdated device drivers can be a significant culprit behind timeout errors in Windows 11. Drivers act as communication bridges between your hardware components (graphics card, network adapter, etc.) and the operating system. Outdated drivers can become incompatible with the latest Windows 11 updates, leading to communication issues and causing timeouts.
Here’s how to update your drivers in Windows 11 and potentially resolve the timeout error:
Why Update Drivers?
Keeping your drivers updated is crucial for maintaining optimal system performance and preventing compatibility issues. New driver updates often include bug fixes, performance enhancements, and security patches. Outdated drivers can not only lead to timeouts but also contribute to system instability and even security vulnerabilities.
Updating Drivers: Multiple Methods Available:
There are three main ways to update drivers in Windows 11:
Method 1: Using Device Manager
- Open Device Manager: Search for “Device Manager” in the Start menu search bar and select the best match.
- Locate Your Device: In the Device Manager window, expand the categories (e.g., Display adapters, Network adapters) to find the specific device you want to update the driver for.
- Right-click and Update: Right-click on the device name and select “Update driver.”
- Search Automatically or Manually: Here, you have two options:
- Search automatically for updated driver software: This is the recommended option. Windows 11 will search online for the latest driver and install it automatically if available.
- Browse my computer for driver software: This option allows you to manually select a downloaded driver file if you have it. (Caution: Ensure compatibility before using this option).
- Follow on-screen instructions: If Windows finds an update, follow the on-screen prompts to download and install it. Restart your computer after the update is complete.
Method 2: Using Windows Update
In some cases, Windows Update might also include driver updates. Here’s how to check:
- Open Windows Update Settings: Open the Settings app and navigate to “Windows Update.”
- Check for Updates: Click on “Check for updates” and wait for Windows to scan for available updates.
- Optional Driver Updates: If driver updates are available, they might be listed under “Optional updates.” You can choose to install them alongside the regular Windows updates.
Method 3: Manufacturer’s Website
For the most recent drivers, you can also visit the website of your device manufacturer (graphics card manufacturer, network adapter brand, etc.). They usually have a dedicated downloads section where you can find the latest drivers compatible with your specific hardware model and Windows 11.
Remember to restart your computer after updating any drivers. By keeping your drivers up-to-date, you can significantly reduce the chances of encountering timeout errors due to driver compatibility issues.
We’ll explore further solutions for fixing timeout errors in Windows 11 in the following sections.
4.3. Modifying Timeout Settings: Fine-Tuning Idle Timeouts (Use with Caution)
This section explores modifying timeout settings in Windows 11. It’s important to note that this approach involves editing the system registry, which can be risky if done incorrectly. It’s recommended to proceed with caution and only if the previous troubleshooting steps haven’t resolved the timeout error.
Before we proceed, here’s a crucial reminder:
- Back Up Your Registry: It’s highly recommended to create a backup of your system registry before making any modifications. This allows you to restore the registry to a previous state if something goes wrong. Search online for instructions on how to back up the registry in Windows 11.
Here are two ways to modify timeout settings:
Changing Screen Timeout Settings (Recommended):
The safest approach is to adjust the screen timeout settings through the Windows 11 interface. This allows you to control how long your screen stays idle before turning off to save power. Here’s how:
- Open the Settings app (Windows key + I).
- Navigate to “System” and then select “Power & battery.”
- In the “Screen and sleep” section, you’ll see options for “Turn off my screen after” on battery power and when plugged in.
- Select the desired timeout duration from the dropdown menu. You can choose from options like 1 minute, 5 minutes, 15 minutes, 30 minutes, 1 hour, or “Never” (to prevent the screen from turning off automatically).
Modifying System Timeout Settings via Registry Editor (Advanced Users Only):
This method involves editing the Windows registry. Proceed with caution and only if you’re comfortable with registry editing. Incorrect modifications can cause system instability.
Here’s a general step-by-step guide, but it’s recommended to consult a reliable source or Microsoft documentation for specific registry key locations and values related to timeout settings in Windows 11.
- Navigate to the Desired Key:
- In the Registry Editor, navigate to the following key:
- mathematica
HKEY_LOCAL_MACHINE\SYSTEM\CurrentControlSet\Control
- Modify WaitToKillServiceTimeout:
- Locate the WaitToKillServiceTimeout entry in the right pane.
- If it doesn’t exist, create it by right-clicking on the right pane, selecting New > String Value, and naming it WaitToKillServiceTimeout.
- Double-click on WaitToKillServiceTimeout to modify it.
- Set the value data to a higher number, such as 20000 (20 seconds), and click OK.
- Modify AutoEndTasks:
- Navigate to the following key:
- mathematica
HKEY_CURRENT_USER\Control Panel\Desktop- Locate the AutoEndTasks entry. If it doesn’t exist, create it by right-clicking on the right pane, selecting New > String Value, and naming it AutoEndTasks.
- Double-click on AutoEndTasks to modify it.
- Set the value data to 1 to enable auto-end tasks, which helps in reducing timeout errors when the system attempts to shut down or log off.
- Restart Your Computer:
- After making these changes, restart your computer for the new settings to take effect.
Remember: If you encounter any issues after modifying the registry, you can restore it from the backup you created earlier.
While modifying timeout settings can potentially address some timeout errors, it’s important to exercise caution and prioritize the first two troubleshooting sections (basic steps and driver updates) for a safer and more straightforward approach. We’ll explore further solutions in the next section.
4.4. Checking Network Settings: Addressing Connectivity Issues
If you’re experiencing timeout errors specifically related to internet connectivity, the issue might lie with your network settings. Here’s how to troubleshoot network settings and potentially resolve the timeout error in Windows 11:
1: Resetting Network Settings:
Windows 11 offers a built-in option to reset network settings. This can be helpful if your network configuration has become corrupted or incompatible, leading to timeout errors. Be aware that this reset will:
- Disable and reinstall all network adapters (Wi-Fi, Ethernet, etc.)
- Forget all saved Wi-Fi networks and passwords
- Remove any custom network settings you’ve configured
Here’s how to reset network settings:
- Open the Settings app (Windows key + I).
- Navigate to “Network & internet.”
- Click on “Advanced network settings” at the bottom of the page.
- Select “Network reset” on the following window.
- You’ll see a confirmation prompt detailing what will be reset. Click “Reset now” to proceed.
- Your computer will restart, and the network settings will be reset to defaults.
2: Troubleshooting Network Adapters:
If resetting network settings doesn’t resolve the issue, you can try further troubleshooting your network adapters:
- Check Physical Connections: Ensure your ethernet cable is securely plugged into your computer and router (if using a wired connection). For Wi-Fi, verify your signal strength and try moving closer to your router.
- Disable and Re-enable Network Adapter: Sometimes, a simple restart of the network adapter can resolve temporary glitches. In the Network & internet settings menu, you can disable and then re-enable your network adapter to see if it helps.
- Update Network Adapter Driver: As mentioned earlier in section 4.2, outdated network adapter drivers can contribute to timeout errors. Refer back to that section for detailed instructions on updating your network driver using Device Manager or the manufacturer’s website.
By addressing potential network settings issues and troubleshooting your network adapters, you can potentially eliminate timeout errors related to internet connectivity in Windows 11.
4.5. Utilizing the Windows Troubleshooter: A Built-in Diagnostic Tool
Windows 11 comes equipped with a handy troubleshooter tool that can help diagnose and fix various system issues, including timeout errors. Here’s how to leverage this tool:
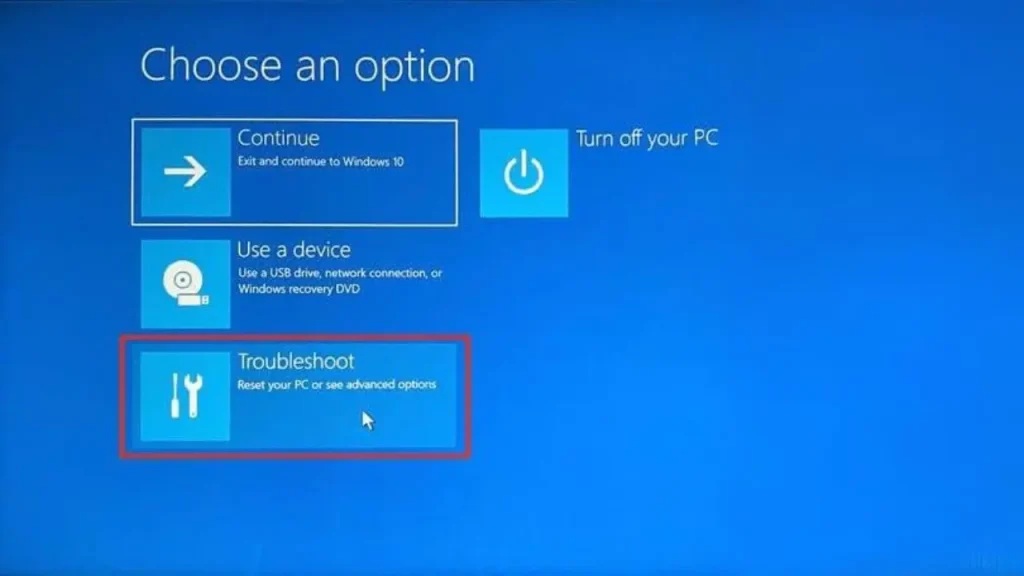
Accessing the Troubleshooter:
There are two ways to access the troubleshooter in Windows 11:
Method 1: Using Settings
- Open the Settings app (Windows key + I).
- Navigate to “System” and then select “Troubleshoot.”
- In the “Troubleshoot” window, you’ll see various troubleshooting options available.
Method 2: Using the Search Bar
- Click on the Start menu search bar and type “troubleshoot.”
- Select “Troubleshoot settings” from the search results.
- This will open the same “Troubleshoot” window as described in Method 1.
Types of Troubleshooting Available:
Once you’ve accessed the troubleshooter window, you’ll find a variety of options to choose from. Here are some relevant options for timeout errors:
- Network Troubleshooter: This troubleshooter can diagnose and fix issues related to your internet connection, which might be causing timeout errors.
- Windows Update Troubleshooter: If outdated Windows updates are contributing to the timeout error, running this troubleshooter can help identify and fix the problem.
- Hardware and Devices Troubleshooter: This troubleshooter can scan for hardware-related issues that might be causing the timeout error.
Running the Troubleshooter:
- Select the appropriate troubleshooter (e.g., Network Troubleshooter) from the list.
- Click on the “Run the troubleshooter” button.
- The troubleshooter will scan your system and attempt to identify any problems. If it finds any issues, it will recommend solutions or attempt to fix them automatically.
- Follow the on-screen instructions provided by the troubleshooter.
By running the relevant troubleshooter tool, you can potentially identify and fix the underlying cause of the timeout error in Windows 11.
We’ll explore some additional tips in the next section that might help you address timeout errors.
5: Advanced Fixes
This section ventures into advanced troubleshooting territory using the Group Policy Editor. It’s primarily intended for users in managed network environments (e.g., businesses, organizations) where Group Policy is used to manage system configurations. Modifying Group Policy settings can have unintended consequences, so proceed with caution and only if authorized to do so by your network administrator.
5.1. Editing Group Policy
The Group Policy Editor is a powerful tool used in Windows environments to manage settings and configurations for multiple computers on a network. It allows administrators to define policies that govern various aspects of system behavior, including settings related to network connections and timeouts.
Important Note: The Group Policy Editor is typically not available on Windows 11 Home edition. It’s usually found in Pro, Enterprise, and Education editions.
Steps to Change Timeout Settings Through Group Policy (Use with Caution)
Before we proceed, here are some crucial points to remember:
- Authorization Required: Modifying Group Policy settings should only be done with proper authorization from your network administrator to avoid disrupting network configurations.
- Potential Issues: Incorrect changes to Group Policy can lead to unintended consequences, potentially affecting other users or network functionality.
- Consult Documentation: It’s highly recommended to consult your network administrator’s documentation or reliable sources for specific Group Policy settings related to timeout errors in your network environment.
With those warnings in mind, here’s a general outline of the steps involved (specific settings and values will vary):
- Open Group Policy Editor: (Not available in Windows 11 Home edition) Search for “gpedit.msc” in the Start menu search bar and select “Run as administrator.”
- Navigate to the Policy: Locate the specific Group Policy setting related to the timeout you want to modify. This will require research on Group Policy settings for timeout behaviors in Windows 11.
- Configure the Setting: Right-click on the relevant policy setting and select “Edit.” Choose the desired configuration option (e.g., “Enabled” and adjust timeout values if applicable) and click “OK.”
- Group Policy Updates: Changes to Group Policy might not take effect immediately. A Group Policy refresh (using the gpupdate /force command) or a system restart might be required for the new settings to apply.
Remember: If you encounter any issues after modifying Group Policy settings, consult your network administrator for assistance.
Since modifying Group Policy is a complex topic, we’ll focus on alternative solutions in the next section that can be applied in most user environments.
5.2. Performing a Clean Boot: Isolating Software Conflicts (For Most Users)
If you’ve exhausted the previous troubleshooting steps, a clean boot can be a helpful technique to isolate software conflicts that might be causing timeout errors in Windows 11. This method is generally safe to perform for most users and doesn’t require venturing into complex settings like Group Policy.
What is a Clean Boot?
A clean boot involves starting Windows 11 with a minimal set of drivers and startup programs. This helps identify if any third-party software or service is conflicting with your system and causing timeout errors.
Steps to Perform a Clean Boot:
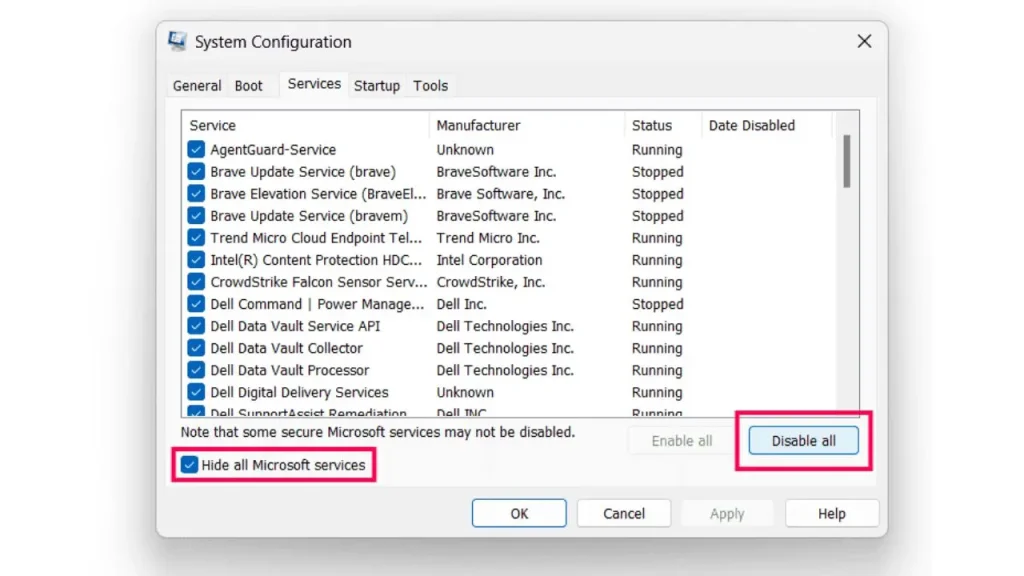
- Open System Configuration: Press the Windows key + R to open the Run dialog box. Type “msconfig” and press Enter to launch the System Configuration utility.
- Disable Services: Go to the “Services” tab. Check the box labeled “Hide all Microsoft services” at the bottom. This ensures you don’t accidentally disable essential system services. Click the “Disable all” button to disable all non-Microsoft services.
- Manage Startup Programs: Go to the “Startup” tab and click on “Open Task Manager.” This will open the Task Manager window.
- Disable Startup Items: In the Task Manager’s “Startup” tab, you’ll see a list of programs configured to run at startup. Right-click on each program you suspect might be causing issues and select “Disable.” You can also systematically disable all startup programs if needed.
- Restart Your Computer: Close Task Manager and System Configuration windows. Restart your computer for the changes to take effect.
Identifying Problematic Services or Applications:
After restarting with a clean boot, observe if you still encounter timeout errors. If the errors are gone, it indicates a conflict with a disabled service or startup program. Here’s how to identify the culprit:
- Systematically Re-enable Services: Go back to System Configuration and the Services tab. Re-enable a small group of services (e.g., 2-3) at a time, restarting your computer after each change. If the timeout errors return, the culprit is likely within the most recently re-enabled group of services. Identify the specific service causing the issue by trial and error within that group.
- Manage Startup Programs: If the clean boot resolves the error, return to Task Manager and the Startup tab. Re-enable startup programs one by one, restarting your computer after each change. When the timeout errors return, you’ve identified the problematic startup program.
By performing a clean boot and following these steps, you can isolate software conflicts that might be contributing to timeout errors in Windows 11.
5.3. System Restore: Revert to a Stable System State (If Applicable)
If none of the previous solutions have resolved the timeout errors in Windows 11, and you suspect a recent system change might be the culprit, System Restore can be a helpful tool. System Restore allows you to revert your system state to a previous point in time, potentially before the timeout errors began.
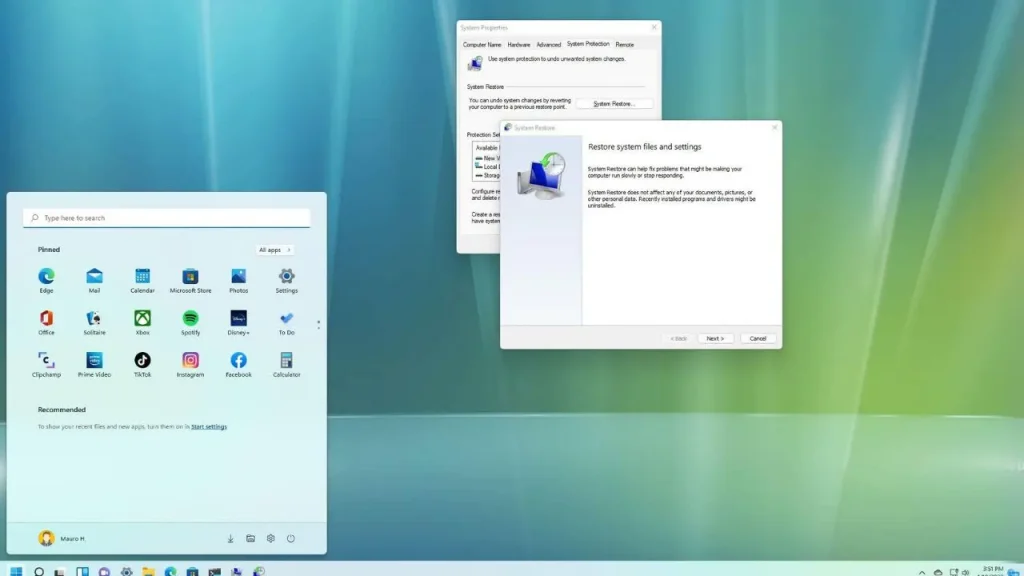
Here’s a crucial point to remember:
- System Restore only works if you have a restore point created before the timeout errors started occurring. If you don’t have a restore point, unfortunately, this option won’t be available.
How System Restore Works:
System Restore creates snapshots of your system files and registry at regular intervals, or when you manually create a restore point. By performing a System Restore, you can revert your system files and registry settings to a previously saved state, potentially resolving issues introduced by recent changes.
How to Create a Restore Point (Perform this step before you experience timeout errors)
It’s always a good practice to create restore points regularly, so you have a safety net in case you encounter system issues. Here’s how to create a restore point:
- Search for “Create a restore point” in the Start menu search bar and select it from the results.
- The System Properties window will open. Click on the “System Protection” tab.
- Under the “System protection settings” section, you’ll see the drive where System Restore is enabled (usually your C: drive). Click on the “Create” button.
- In the “Create a restore point” window, give your restore point a descriptive name (e.g., “Before recent updates”) to help you identify it later. Click on “Create.”
- System Restore will create a restore point for your system. This process might take a few minutes.
How to Perform a System Restore (If you have a restore point created before the timeout errors):
- Access the System Properties window as described in steps 1 and 2 of the “How to Create a Restore Point” section.
- Click on the “System Restore” button.
- In the System Restore window, choose the restore point you want to use (ideally one created before the timeout errors started). Click “Next.”
- Confirm the restore point details and click “Next” again.
- You’ll see a final confirmation window before proceeding. Click “Finish” to initiate the System Restore process. Your computer will restart, and the system files and registry will be restored to the chosen restore point.
Important Note: System Restore won’t affect your personal files like documents, pictures, or music. However, it might uninstall recently installed programs or revert settings changes made after the chosen restore point was created.
By using System Restore (if a relevant restore point exists), you might be able to resolve timeout errors in Windows 11 by reverting your system to a stable state before the errors began.
Prevention Tips
Preventing timeout errors in Windows 11 involves proactive system maintenance and updates. Here are some essential prevention tips to ensure your system remains stable and efficient.
Regular System Updates
Keeping your operating system updated is crucial for maintaining stability and security. Microsoft regularly releases updates for Windows 11 that include security patches, performance improvements, and bug fixes.
- Enable Automatic Updates:
- Open Settings: Click on the Start menu and select Settings (the gear icon).
- Go to Windows Update: Navigate to Update & Security > Windows Update.
- Check for Updates: Click on Check for updates to see if there are any new updates available. If there are, Windows will download and install them automatically.
- Set Automatic Updates: Ensure that your system is set to install updates automatically. In the Windows Update settings, click on Advanced options and make sure Automatic (recommended) is selected under Choose how updates are installed.
- Schedule Update Installations:
- To avoid interruptions, you can schedule when updates are installed. Under Advanced options in Windows Update settings, you can set Active hours to define when updates should not be installed to avoid disruption.
Keeping Drivers and Software Updated
Updating drivers and software regularly helps prevent compatibility issues and system errors.
- Regularly Check for Driver Updates:
- Device Manager: Open Device Manager by pressing Windows + X and selecting Device Manager. Right-click on a device and select Update driver > Search automatically for updated driver software.
- Windows Update: Go to Settings > Update & Security > Windows Update. Click on Check for updates to include driver updates.
- Manufacturer’s Websites: Visit the official websites of your hardware manufacturers (e.g., Intel, NVIDIA, AMD) to download and install the latest drivers.
- Update Software Applications:
- In-App Updates: Most applications have a built-in update feature. Regularly check for updates within the software.
- App Store/Marketplace: For apps downloaded from the Microsoft Store, open the Microsoft Store app, click on Library, and then on Get updates to ensure all your apps are up to date.
Regular System Maintenance Practices
Performing regular system maintenance helps keep your system running smoothly and reduces the likelihood of errors.
- Disk Cleanup:
- Open Disk Cleanup: Type Disk Cleanup in the search bar and select the tool.
- Select Drive: Choose the drive you want to clean up (usually C:).
- Clean Up System Files: Click on Clean up system files to remove unnecessary system files, temporary files, and other junk.
- Defragment and Optimize Drives:
- Open Defragment Tool: Type Defragment and Optimize Drives in the search bar and select it.
- Analyze and Optimize: Select your hard drive and click on Analyze. If the drive needs optimization, click on Optimize. Note: SSDs don’t require defragmentation but can be optimized.
- Regular Antivirus Scans:
- Use Built-in Tools: Windows Defender provides robust protection. Ensure it is enabled and performing regular scans.
- Third-Party Antivirus: If you use third-party antivirus software, schedule regular scans to detect and remove malware or viruses.
- Backup Important Data:
- Use Built-in Backup Tools: Windows 11 includes tools like File History and Backup and Restore. Go to Settings > Update & Security > Backup to set up backups.
- Cloud Services: Consider using cloud storage solutions like OneDrive, Google Drive
- Monitor System Performance:
- Task Manager: Use Task Manager to monitor CPU, memory, disk, and network usage. Press Ctrl + Shift + Esc to open Task Manager, then click on the Performance tab. This helps you identify any processes or applications that are consuming excessive resources.
- Resource Monitor: For more detailed information, use Resource Monitor. Type Resource Monitor in the search bar and select it. This tool provides in-depth insights into system resource usage, helping you spot potential issues early.
- Uninstall Unnecessary Programs:
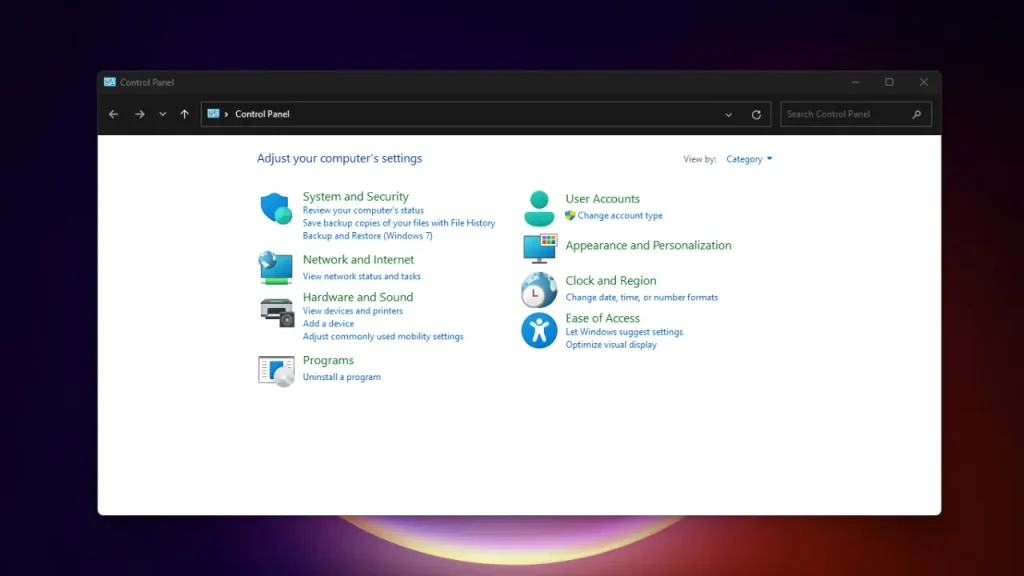
- Control Panel: Open Control Panel, go to Programs > Programs and Features, and review the list of installed applications. Uninstall any programs that you no longer use or need to free up system resources.
- Settings: Alternatively, go to Settings > Apps > Apps & features to manage and uninstall applications.
- Manage Startup Programs:
- Task Manager: Open Task Manager, go to the Startup tab, and review the list of programs that start with Windows. Disable any unnecessary startup programs to improve boot times and overall system performance.
- Check for Disk Errors:
- Check Disk Utility: Use the built-in Check Disk utility to scan for and repair disk errors. Open a Command Prompt as an administrator (type cmd in the search bar, right-click on Command Prompt, and select Run as administrator). Then type chkdsk /f and press Enter. You may need to schedule the scan to run at the next system restart.
- Optimize System Settings:
- Performance Options: Adjust system settings for optimal performance. Right-click on This PC and select Properties. Click on Advanced system settings, go to the Advanced tab, and under Performance, click on Settings. Choose Adjust for best performance or Custom to manually select which visual effects to enable or disable.
When to Seek Professional Help
You’ve bravely tackled troubleshooting timeout errors in Windows 11. However, there might be situations where the issue persists despite your efforts. Here’s when seeking professional help from a technician or IT professional might be advisable:

Indicators You Need Professional Help:
- The issue persists after trying all the troubleshooting steps mentioned above.
- You’re uncomfortable or unsure about performing certain troubleshooting steps, particularly those involving editing the registry or Group Policy (if applicable in your environment).
- The timeout errors are accompanied by other system instability issues (frequent crashes, blue screens, etc.) that you’re unable to resolve.
- You suspect hardware problems might be contributing to the timeout errors.
How to Find Reliable Tech Support:
- Microsoft Support: Microsoft offers various support options including online resources, virtual chat support, and phone support depending on your location and warranty status.
- Computer Repair Shops: Local computer repair shops can often diagnose and fix hardware or software issues that might be causing timeout errors.
- Trusted IT Professionals: If you’re in a corporate environment, your organization’s IT department can provide assistance with troubleshooting timeout errors on your work computer.
Here are some tips for finding reliable tech support:
- Read online reviews: Look for reputable computer repair shops or IT professionals with positive customer reviews.
- Ask for recommendations: Get recommendations from friends, family, or colleagues who have had positive experiences with tech support providers.
- Be clear about the issue: When seeking help, clearly explain the timeout errors you’re experiencing and the troubleshooting steps you’ve already tried.
By seeking professional help from a qualified technician or IT professional, you can potentially get your Windows 11 system back to running smoothly and free of timeout errors.
Conclusion: Conquering Timeout Errors in Windows 11
Timeout errors can be frustrating, disrupting your workflow and hindering your productivity. But fear not, this guide has equipped you with a comprehensive arsenal of troubleshooting methods to combat these errors in Windows 11!
Let’s Recap the Solutions We Explored:
- Initial Troubleshooting: Simple restarts, internet connection checks, Windows updates, and malware scans can often resolve basic timeout errors.
- Advanced Fixes: We delved into adjusting power settings, updating drivers, modifying timeout settings (with caution), checking network settings, and utilizing the Windows troubleshooter.
- For Advanced Users: For network environments, we explored using Group Policy Editor (proceed with caution!).
- Identifying Conflicts: Performing a clean boot can help isolate software conflicts that might be causing the errors.
- System Restore (if applicable): If a recent system change triggered the errors, System Restore can potentially revert your system to a stable state.
- Prevention Tips: Regular system updates, maintaining updated drivers, and good system hygiene practices can significantly reduce the chances of timeout errors.
Ready to Tackle Timeout Errors?
We encourage you to try the solutions outlined in this guide, starting with the initial troubleshooting steps and progressing to more advanced solutions if necessary. Remember, don’t hesitate to seek professional help if you’re unsure about any steps or the issue persists.
We Want to Hear from You!
Have you encountered timeout errors in Windows 11? Which solutions worked best for you? Perhaps you have additional questions or tips to share? Leave a comment below, and let’s keep the conversation going!
By working together, we can create a valuable resource for anyone facing timeout errors in Windows 11.
Frequently Asked Questions (FAQs)

Q1: What exactly are timeout errors in Windows 11?
A: Timeout errors occur when a program or process doesn’t receive a response from another program or device within a set time limit. This can manifest as freezing, error messages, or unexpected application closures.
Q2: What causes timeout errors in Windows 11?
A: Timeout errors can have various causes, including outdated drivers, software conflicts, network connectivity issues, resource limitations due to power settings, or even hardware problems.
Q3: How can I fix timeout errors in Windows 11?
A: There are many troubleshooting methods you can try, ranging from basic checks like restarting your computer and verifying your internet connection to more advanced solutions like modifying timeout settings (with caution) or performing a clean boot to isolate software conflicts. Refer to the previous sections of this guide for a detailed breakdown of troubleshooting steps.
Q4: How Do I Recognize Timeout Error Symptoms?
A: Look out for the following symptoms:
• Frozen Applications: Running apps become unresponsive.
• Unresponsive System: Overall system slowdown.
• Failed Downloads: Incomplete file downloads due to timeouts.
Q5: Should I edit the registry or Group Policy to fix timeout errors?
A: Editing the registry or Group Policy can be effective but should be approached with caution. These options are included in this guide but are recommended for advanced users or for users in managed network environments where administrators understand the potential consequences of modifying these settings. It’s generally safer to try other troubleshooting methods first.
Q6: When should I seek professional help for timeout errors?
A: If you’ve exhausted the troubleshooting steps in this guide and the errors persist, or if you’re uncomfortable with certain methods, consider seeking help from a qualified technician or IT professional. They can diagnose the issue and provide further assistance.
Q7: Can hardware issues cause timeout errors?
A: Yes, hardware issues like failing hard drives, overheating components, or malfunctioning network adapters can cause timeout errors. If you suspect hardware problems, consider running diagnostic tests or seeking professional help.
Q8: How do I update my drivers in Windows 11?
A: You can update drivers through Device Manager, Windows Update, or by downloading the latest drivers from the manufacturer’s website. In Device Manager, right-click on the device, select “Update driver,” and choose “Search automatically for updated driver software.”
Q9: What is a clean boot, and how does it help with timeout errors?
A: A clean boot starts Windows with a minimal set of drivers and startup programs, which helps identify software conflicts causing timeout errors. By selectively enabling services and startup items, you can pinpoint and resolve the problematic software.


