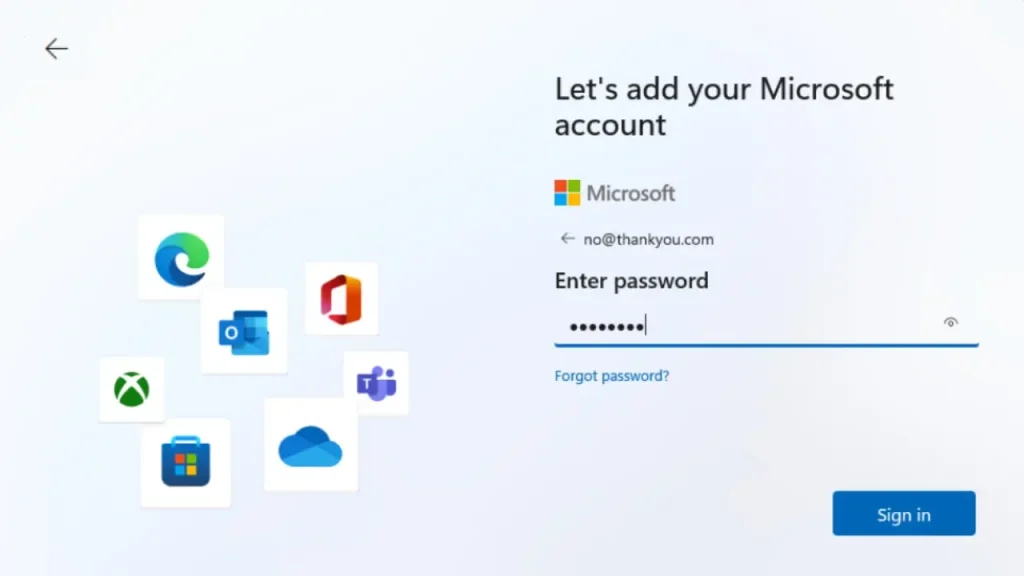
So, you’ve got a new Windows 11 PC, but you’re not too keen on adding a Microsoft account? No worries! During the initial setup, simply look for the “Offline account” option, click on it, and follow the prompts to set up a local account instead. This allows you to skip the whole Microsoft account setup process and jump straight into using your PC with a local account.
Already set up your PC with a Microsoft account but want to switch to a local account? Easy peasy! Just head to Settings, navigate to Accounts, select “Your info,” and click on “Sign in with a local account instead.” Follow the on-screen instructions to verify your current password and set up a new username and password for your local account. Once done, sign out and sign back in with your new local account, and you’re good to go! Enjoy your Windows 11 experience without the hassle of a Microsoft account.
Understanding the Need for a Microsoft Account in Windows 11
First off, having a Microsoft account unlocks a whole bunch of cool features and functionalities within Windows 11. It’s like having a key to a treasure chest full of goodies. With a Microsoft account, you can sync your settings, themes, and even your desktop background across different devices. So, if you’re someone who likes things just the way you like them, having a Microsoft account makes sure you’re always feeling right at home, no matter which device you’re using.
Not only that, but a Microsoft account also gives you access to the Microsoft Store, where you can download apps, games, and other awesome stuff. It’s like having your own personal shopping spree, right at your fingertips. Plus, having a Microsoft account makes it easier to stay connected with friends and family through apps like Skype and Outlook.
Reasons For Wanting To Skip Adding A Microsoft Account In Windows 11
Let’s talk about why someone might want to skip adding a Microsoft account in Windows 11.
For starters, some folks might be all about privacy. They don’t want their personal info tied to everything they do on their computer. Adding a Microsoft account means giving Microsoft access to certain data, like your browsing history and app usage, which isn’t everyone’s cup of tea.
Then there’s the whole hassle factor. Some people just don’t want to deal with creating yet another account and remembering another password. It’s like having a pile of keys to keep track of, and who needs that kind of headache?
Plus, let’s not forget the rebels out there. They march to the beat of their own drum and don’t want to be tied down by the man (or in this case, Microsoft). They’re all about independence and doing things their own way, even if it means missing out on some of the nifty features that come with a Microsoft account.
Whether it’s privacy concerns, a distaste for passwords, or just a rebellious streak, there are plenty of reasons why someone might want to skip adding a Microsoft account in Windows 11. And hey, to each their own, right?
Options for skipping the Microsoft account setup during Windows 11 installation
First up, you can choose the “Offline account” option during setup. This lets you create a local account on your computer without needing to link it to a Microsoft account. It’s perfect for those who want to keep things simple and don’t need all the bells and whistles of a Microsoft account.
Another option is to disconnect from the internet during setup. When you’re not connected, Windows 11 gives you the choice to create a local account instead of a Microsoft one. This way, you can set up your computer without worrying about being nudged towards signing in with a Microsoft account.
If you’ve already set up your Windows 11 with a Microsoft account but now want to switch to a local account, don’t worry, you can do that too! Just head over to the Settings menu, go to “Accounts,” and then select “Sign in with a local account instead.” From there, follow the prompts to switch over to a local account hassle-free.
Whether you’re setting up Windows 11 for the first time or looking to make a change down the road, there are plenty of options for skipping the Microsoft account setup and sticking with a good old-fashioned local account.
Method 1: How to Install Windows 11 Without a Microsoft Account Using Rufus
Rufus is a nifty little tool that lets you create bootable USB drives, perfect for installing operating systems like Windows 11. Here’s how you can use Rufus to skip the Microsoft account setup:
- Download Windows 11 ISO: First things first, you’ll need the Windows 11 installation files. You can download the ISO file from the official Microsoft website or through other trusted sources.
- Download Rufus: Head over to the Rufus website and download the latest version of the software. Rufus is free to use and super handy for creating bootable USB drives.
- Insert USB Drive: Plug in your USB drive to your computer. Make sure it’s big enough to hold the Windows 11 installation files (at least 8GB).
- Open Rufus: Launch Rufus on your computer. You might need to grant administrative privileges depending on your system settings.
- Select USB Drive and ISO: In Rufus, under “Device,” select your USB drive from the dropdown menu. Then, under “Boot selection,” click on “Select” and choose the Windows 11 ISO file you downloaded earlier.
- Configure Rufus Settings: Leave the Partition scheme, File system, and Cluster size settings as they are (usually, they’re set correctly by default). You can give your USB drive a label if you want, but it’s not necessary.
- Start Rufus: Once everything looks good to go, click on the “Start” button in Rufus. You’ll get a warning that all data on the USB drive will be erased. Confirm and proceed.
- Wait for Completion: Rufus will now start creating the bootable USB drive with the Windows 11 installation files. This process might take a little while, so sit back and relax.
- Boot from USB: Once Rufus is done, you’ll have a bootable USB drive ready to go. Restart your computer and boot from the USB drive to begin the Windows 11 installation process.
- Follow Windows 11 Setup: During the installation process, when prompted to sign in with a Microsoft account, simply choose the option to set up a local account instead. Voila! You’ve installed Windows 11 without needing a Microsoft account, thanks to Rufus.
And there you have it! With Rufus, installing Windows 11 without a Microsoft account is a breeze. So go ahead, give it a try, and enjoy your Microsoft account-free Windows experience!
Method 2: Using a local account during installation
By following these steps, you can install Windows 11 using a local account instead of a Microsoft account, ensuring greater privacy and independence in your computing experience.
Step 1: Start the Windows 11 Installation Process
Begin by inserting your Windows 11 installation media, whether it’s a USB drive or a DVD, into your computer. Restart your computer and boot from the installation media. This typically involves pressing a key (like F2, F12, or Del) during the startup process to access the boot menu and selecting the installation media as the boot device.
Step 2: Select “I Don’t Have Internet Connection” During the Windows 11 Setup
Once the Windows 11 installation process begins, you’ll be prompted to choose your language, time, and keyboard preferences. After that, you’ll come to a screen where you’re asked to connect to a network. Here, select the option that says “I don’t have internet connection.” This prevents Windows 11 from pushing you towards signing in with a Microsoft account.
Step 3: Choose to Create a Local Account Instead of a Microsoft Account
After selecting the “I don’t have internet connection” option, Windows 11 will ask you to sign in with a Microsoft account. However, since you’ve chosen not to connect to the internet, you’ll see a small link at the bottom that says “Offline account.” Click on this link to proceed with creating a local account.
Step 4: Complete the Windows 11 Installation Using a Local Account
Follow the prompts to create a local account. You’ll need to provide a username, password, and a password hint. Once you’ve filled in the necessary information, continue with the installation process as usual. Windows 11 will finalize the installation using your newly created local account.
Related Article: How To Optimize Your PC for Best Performance
Method 3: How to Bypass Windows 11 Microsoft Account Requirement Using Command Prompt
If you’re a fan of command-line magic, you can bypass the Microsoft account requirement during Windows 11 installation using Command Prompt. Here’s how:
- Boot from Windows 11 Installation Media: Insert your Windows 11 installation media (USB drive or DVD) into your computer and restart it. Boot from the installation media by accessing the boot menu and selecting the appropriate device.
- Access Command Prompt: When you reach the initial Windows 11 installation screen, press Shift + F10 on your keyboard. This key combination will open a Command Prompt window.
- Navigate to System32 Directory: In the Command Prompt window, type the following command and press Enter:
- Execute Command to Launch Installation: Next, type the following command and press Enter to launch the Windows 11 installation:
- Create Local Account: Follow the on-screen instructions to proceed with the installation. When prompted to sign in with a Microsoft account, choose the option to create a local account instead.
- Complete Installation: Continue following the installation prompts to set up Windows 11 using your newly created local account.
By using Command Prompt to launch the Windows 11 installation process, you can bypass the Microsoft account requirement and opt for a local account instead. This method provides greater flexibility and control over your Windows 11 setup, ensuring that you can tailor your experience to your preferences.
Method 4: Adding a Microsoft account after Windows 11 installation
By following these steps, you can add a Microsoft account after Windows 11 installation and switch to a local account if desired, giving you more control over your account settings and preferences.
Step 1: Complete the Windows 11 Installation with a Microsoft Account
During the initial setup of Windows 11, if you chose to sign in with a Microsoft account, proceed with the installation as usual. Enter your Microsoft account credentials when prompted, and complete the installation process.
Step 2: Go to the Settings and Accounts Section in Windows 11
Once Windows 11 is fully installed and you’re at the desktop, click on the Start button and select the Settings (gear icon) from the menu. In the Settings window, click on the “Accounts” option.
Step 3: Choose “Sign in with a Local Account Instead”
In the Accounts settings, you’ll see various options related to your account. Look for the option that says “Sign in with a local account instead” and click on it. Windows 11 will prompt you to verify your current Microsoft account password for security purposes.
Step 4: Follow the Prompts to Create a Local Account
After entering your Microsoft account password, Windows 11 will guide you through the process of creating a local account. You’ll need to provide a username, password, and a password hint for your local account. Follow the prompts to complete the creation of the local account.
Once the local account is created, you’ll be signed out of your Microsoft account and signed in with the newly created local account. However, your Microsoft account will still be associated with your Windows 11 installation.
Benefits of skipping the Microsoft account in Windows 11
Skipping the Microsoft account setup in Windows 11 offers several benefits:
- Privacy: By opting for a local account instead of a Microsoft account, you can keep your personal information more private. With a Microsoft account, there may be data synchronization and tracking features that you might not want to enable, whereas a local account keeps your information confined to your device.
- Independence: Using a local account gives you more control over your Windows 11 experience. You’re not tied to Microsoft’s ecosystem, and you can choose which Microsoft services you want to use without being required to sign in with a Microsoft account.
- Simplicity: Setting up a local account is often quicker and simpler than creating or signing in with a Microsoft account. It’s especially convenient for users who prefer a straightforward setup process without the need to create yet another online account.
- Flexibility: With a local account, you’re not dependent on an internet connection to access your computer. This can be particularly useful in situations where you don’t have reliable internet access or if you’re setting up a device for temporary use.
- No Email Integration: Some users might prefer to keep their email separate from their operating system. By skipping the Microsoft account setup, you avoid integrating your email with Windows 11, maintaining distinct platforms for communication and computing.
Overall, skipping the Microsoft account setup in Windows 11 offers users greater privacy, independence, simplicity, flexibility, and control over their computing experience. It’s a choice that empowers users to tailor their setup according to their preferences and needs.
limitations of skipping the Microsoft account in Windows 11
While there are benefits to skipping the Microsoft account setup in Windows 11, it’s important to consider the limitations as well:
- Limited Synchronization: One of the primary advantages of using a Microsoft account is the ability to synchronize settings, preferences, and files across multiple devices. By opting for a local account, you forfeit this synchronization feature, which can be inconvenient if you frequently switch between devices and want a consistent experience.
- Restricted Access to Microsoft Services: Some Microsoft services and features may require a Microsoft account for full functionality. For example, accessing the Microsoft Store, OneDrive cloud storage, or certain productivity apps may be more seamless with a Microsoft account. Skipping the Microsoft account setup may limit your access to these services or require additional steps to use them.
- Limited Support for Windows Features: Certain Windows 11 features and functionalities may be tied to a Microsoft account. For instance, features like Cortana, Windows Hello facial recognition, and Family Safety settings may work more effectively when linked to a Microsoft account. Opting for a local account could result in reduced functionality or compatibility with these features.
- Inconvenience for Existing Microsoft Account Users: If you already have a Microsoft account with existing data and settings, skipping the Microsoft account setup during Windows 11 installation means you’ll need to manually configure settings and preferences on each device. This can be time-consuming and may result in inconsistencies across devices.
- Limited Security Features: Microsoft accounts offer additional security features, such as two-factor authentication and account recovery options, to help protect your account from unauthorized access. Using a local account may lack these built-in security measures, potentially making your device more vulnerable to security threats.
- Incompatibility with Some Apps and Services: Certain third-party apps and services may require a Microsoft account for authentication or integration. Skipping the Microsoft account setup could limit your ability to use these apps or require alternative methods for authentication.
Overall, while skipping the Microsoft account setup in Windows 11 may provide more privacy and independence, it also comes with limitations in terms of synchronization, access to Microsoft services, support for Windows features, security features, and compatibility with certain apps and services. Users should weigh these factors carefully when deciding whether to opt for a local account or a Microsoft account during Windows 11 setup.
How to Create a Local Account on Windows 11
Creating a local account on Windows 11 is a straightforward process. Here’s how to do it:
- Open Settings: Click on the Start button in the taskbar, then click on the gear icon to open Settings. Alternatively, you can press the Windows key + I on your keyboard to quickly open Settings.
- Go to Accounts: In the Settings window, click on the “Accounts” option.
- Select “Family & other users”: In the Accounts settings, select “Family & other users” from the sidebar menu.
- Click on “Add account”: Under the “Other users” section, click on the “Add account” button.
- Choose “Local account”: In the “How will this person sign in?” window, click on the link that says “I don’t have this person’s sign-in information.”
- Create the account: On the next screen, click on the link that says “Add a user without a Microsoft account.” This will prompt you to create a username and password for the local account. Enter the desired username and password, then click on the “Next” button.
- Complete the setup: Follow the remaining prompts to complete the setup of the local account. You may be asked to provide security questions or a password hint for the account.
- Verify the account (if required): Depending on your account settings, you may need to verify the local account through email or phone. Follow the on-screen instructions to verify the account, if necessary.
- Sign out and sign in: Once the local account is created, sign out of your current account by clicking on your profile picture in the Start menu and selecting “Sign out.” Then, sign in to the newly created local account by clicking on the profile picture on the login screen and entering the password.
How to Convert an Existing Microsoft Account to a Local Account
Converting an existing Microsoft account to a local account on Windows 11 involves a few steps. Here’s how to do it:
- Open Settings: Click on the Start button in the taskbar, then click on the gear icon to open Settings. Alternatively, you can press the Windows key + I on your keyboard to quickly open Settings.
- Go to Accounts: In the Settings window, click on the “Accounts” option.
- Select “Your info”: In the Accounts settings, select “Your info” from the sidebar menu.
- Sign in with a local account instead: Under the “Your account” section, click on the link that says “Sign in with a local account instead.”
- Enter Microsoft account password: You will be prompted to enter the password for your Microsoft account to verify your identity.
- Create a local account: After verifying your identity, you will be asked to create a username and password for the local account. Enter the desired username and password, then click on the “Next” button.
- Complete the setup: Follow the remaining prompts to complete the setup of the local account. You may be asked to provide security questions or a password hint for the account.
- Sign out and sign in: Once the local account is created, sign out of your current account by clicking on your profile picture in the Start menu and selecting “Sign out.” Then, sign in to the newly created local account by clicking on the profile picture on the login screen and entering the password.
How to Remove a Microsoft Account From Windows 11
To remove a Microsoft account from Windows 11, you’ll need to switch from the Microsoft account to a local account. Here’s how you can do it:
- Open Settings: Click on the Start button in the taskbar, then click on the gear icon to open Settings. Alternatively, you can press the Windows key + I on your keyboard to quickly open Settings.
- Go to Accounts: In the Settings window, click on the “Accounts” option.
- Select “Your info”: In the Accounts settings, select “Your info” from the sidebar menu.
- Sign in with a local account instead: Under the “Your account” section, click on the link that says “Sign in with a local account instead.”
- Enter Microsoft account password: You will be prompted to enter the password for your Microsoft account to verify your identity.
- Create a local account: After verifying your identity, you will be asked to create a username and password for the local account. Enter the desired username and password, then click on the “Next” button.
- Complete the setup: Follow the remaining prompts to complete the setup of the local account. You may be asked to provide security questions or a password hint for the account.
- Remove the Microsoft account: Once you’ve successfully switched to a local account, you can remove the Microsoft account from your device. Go back to the “Accounts” settings, select “Your info,” and then click on the “Sign in with a Microsoft account instead” link. Follow the prompts to sign in with the Microsoft account, then select “Remove” to remove it from your device.
Conclusion
In conclusion, managing accounts on Windows 11 offers users flexibility and control over their computing experience. While using a Microsoft account provides access to synchronization features and Microsoft services, opting for a local account offers greater privacy and independence.
Users can choose to create a local account during the Windows 11 installation process or convert an existing Microsoft account to a local account through the Settings menu. Additionally, removing a Microsoft account from Windows 11 is possible by switching to a local account and then removing the Microsoft account from the device.
By understanding the benefits and limitations of both Microsoft and local accounts, users can tailor their Windows 11 setup to suit their preferences and needs. Whether prioritizing privacy, simplicity, or access to Microsoft services, Windows 11 accommodates various user preferences through its account management options.
How to Delete Your Facebook Account Without a Password: A Step-by-Step Guide
FAQ
-
Q: How do I skip Microsoft account setup in Windows 11?
A: To skip the Microsoft account setup during Windows 11 installation, you can choose the “Offline account” option or disconnect from the internet during setup. Alternatively, you can create a local account after the installation process by selecting the option to sign in with a local account instead of a Microsoft account.
-
Q: How do I get Windows 11 to stop asking for Microsoft account?
A: If Windows 11 is continuously asking for a Microsoft account, you can opt to sign in with a local account instead during the setup process. You can also go to the Settings menu, navigate to Accounts, and select “Sign in with a local account instead” to switch from a Microsoft account to a local account.
-
Q: How do I add a non-Microsoft account to Windows 11?
A: To add a non-Microsoft account, also known as a local account, to Windows 11, you can do so during the setup process or through the Settings menu. During setup, choose the option to sign in with a local account instead of a Microsoft account. Alternatively, go to Settings > Accounts > Your info, and select “Sign in with a local account instead” to switch from a Microsoft account to a local account.
-
Q: Does Windows 11 force you to use a Microsoft account?
A: While Windows 11 encourages users to sign in with a Microsoft account to access additional features and services, it does not force users to use one. You can choose to sign in with a local account during the setup process or switch to a local account at any time through the Settings menu.

